2014/11/22

The weekly makeup

Hello friends! Happy weekend.
When doing an eye makeup I need inspiration. This I get from the things around me, anything at all. It can be a movie i've seen, the weather, a picture or just the mood i'm in. It´s like a painting. But mostly the looks I make is based on the mood the weather or season puts me in. Like warm in the fall, cool in the winter, fresh in the spring and soft in the summer. If you look at it that way you can see so much more in makeup then just a mess of colors. 
In the last post I talked about how you can make a look more dramatic just by adding some strong colors. So That´s what I did for this weeks look. A beautiful green color. At first I thought it was to light, more suitable for spring and summer. But then I thought if I add a dark brown around the green it takes down the summery feeling. And it turned out pretty good if I may say so myself hihi.


Products used:

IsaDora Twist-up metallic eye pen in Paradise green: As a base on the whole eye lid. Then blending it out with a flat brush or a finger.
Makeup Store Cyber Shadow in Jelly: Using the Sigma E55 and patting the wonderful color over the whole lid. Then taking a small eye smudge brush (Makeup Store 112) and bringing the green color down under the lower lash line all the way in to the inner corner of the eye.
MAC eyeshadow in Espresso: This color was placed around the green. So with a fluffy Sigma E40 I placed the color at the outer corner of the lid and then blending it upp in the crease and on the brow bone
MAC eyeshadow in Shroom: As a highlight under the eye brow.
IsaDora colorful eyeliner in black: An even line and a wing on the upper lash line.
Maybelline Rocket volum express
Benefit speed brow
Maybelline Eye Studio in Smoky black: Filling in the eye brows.

On the rest of my face:
Mary kay CC-cream in Deep
Clinique loose powder in an unknown color (sorry...)
Sigma Paris palette blush in Rouge

Have a fine weekend everyone! 


2014/11/18

Makeupbasics part 7

I think I have gone through most of the basics in makeup. But yeah there's always something more to learn, a lot more, i'm sure. This time I wanted to write about how to make your makeup look something extra. And I thought it would be perfect for the upcoming holidays. The tips are very simple and suitable for all makeup looks. The first and easiest way to make the look more dramatic is to add more color or stronger colors. For example if you are wearing a brown natural makeup, and i'm talking eye makeup here, add a darker brown and shade with black, maybe some mascara if you're not wearing that. You can also make the wings on your eyeliner bigger, thicker and longer. So simple!

Another tip is to put loose glitter over the eyelid. This can be done with a fixing spray, like the MAC Fix+. When the makeup is done you spray the Fix+ on a flat brush (or direct on the lid) and pat it on where you want the glitter. Then taking a small fluffy but flat brush and patting on the glitter over the fixing spray. There are many kinds of loose glitters. Just make sure it´s fore the eyes. You can use colored glitter whitch will make the look even moore dramatic, perfect for a party or new years eve. The glitter I use is kind of a translucent glitter. I like that because it takes on the color of the shadow beneath it. I love to add the glitter! It's so beautiful and sparkly. And also very simple. The glitter can be found at any makeup store, like Makeup Store, MAC or KICKS. I bought mine at H&M for like 39 kr I think.

And the third tip for a more party, fun, exciting look is the false lashes! The fabulous falsies...It can be a bit tricky to get them on and in the right place. But with some practice, a good glue and a tweezer you'll get it right. Good brands for false lashes are Ardell, Depend and MAC. For the glue I use DUO adhesive. My favorit false lashes so far is the MAC Marge Simpson false lashes. They are so cute. Sometime i´m gonna try falsies that are super crazy like feathers or something, because you can finde all kinds. But the most extreme is maybe a bit too much even for new years. They might be good for a masquerade or something like that but I still think you should have tried them as well, just for fun.

So those were my tips on how to make you the queen of the night. I might do some more dramatic looks as the christmas holidays are getting closer.
So till next time, take care!


2014/11/15

Christmas is coming...

Yes I know i'm starting early, but that´s what happens every year so I think the people around me has gotten used to it by now. But since christmas is so big for me there's a lot of planning to do. A lot of get togethers that has to fit into the working schedule. And that part is always the hardest part. But if you like me start in time you have it all planned when december comes and you can just sit back and enjoy it. The same goes for christmas presents. My mun always by them all in the beginning of december, and then it´is all done. No stress and no last minute rush in the crazy christmas shopping war. I´m not as good as her on that but I try. So far I haven´t bought any presents but I have gotten some more christmas decorations. I´m not sure where to put it all when christmas is over, but that is a later problem. This year's challenge is to convince my boyfriend that we need another christmas tree, I mean we only have one, and we all know that's not enough, don't you agree?! No, I want a tree in the kitchen with food inspired decorations. We have a fake tree in the living room and that´s fine. You don´t have to clean up after it. The one we have now i white so i guess the one in the kitchen could be green.
As you can see I have a lot of planning to do so it´s not hard to understand why I have to start in time.
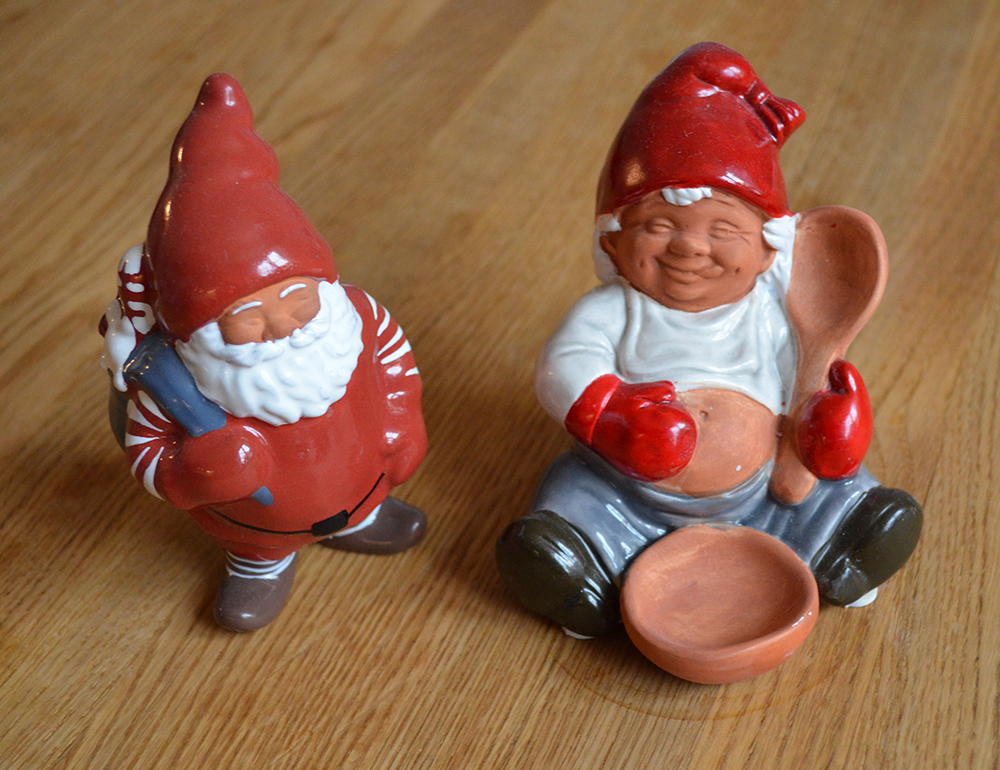
Below you can see the new christmas stuff...


Cute, right?
I have also bought a powder that you mix with water and then it turns into fake snow. So i´m going to do something nice with that.
Next weekend we are going to make gingerbread houses (also a family tradition) and the weekend after that it´s time to clean up and then put up all the decorations.
But before that...a whole lot of work. Two weekends in a row is not something I prefer. Next week i'll see if I can come up with some more makeup basics-tips and it's time for a new makeup look. But I need inspiration...SO LET IT SNOW!!!


2014/11/11

I love my Mary Kay

I have some great stuff to show you guys. I got some new Mary Kay products.
I want to start by telling you that my lovely sister is getting married in february. I'm so excited, not only because it's a wedding and I have been longing for a wedding to go to for a long time, but i´m gonna be one of the bridesmaids. So of course for me the makeup came to my mind. The bridesmaids dresses is gonna be in gray/silver and when that was decided I started thinking about the makeup. And what better way to get inspired then to book a makeup class with our Mary Kay skin care consultant. So the other bridesmaid, my sister and I went to her Mary Kay studio (where i have been spending a lot of time lately) and tried out makeup. It was so much fun. Anyway, my makeup look is gonna be blue, using two beautiful blue eyeshadows and a black eyeliner and on the lips, a purple lip gloss. So yes, that´s what I got and they arrived today. The colors are so pretty and i´m sure they will look nice with the gray/silver dress on a cold day in february. The eyeshadows and the lip gloss fits in my Mary Kay compact so I can easily cary all the makeup I need on the big day. But i'll probably be carrying everything the bird might need as well, big responsibility, hihi.
When my dress is done i'll show it to you here on the blog. I'm sure it's gonna be beautiful. My mom is going to make it. We have ordered to patterns so will see which one it will be at the end. Both are really nice!.So that's gonna be awesome!
A while before that I was at the Mary Kay studio to try the new makeup stuff for this fall. And yes, I fell for some pretty lip stuff. A lipgloss and a lipstick. The lipstick is a matte brown/pink color (not the best description but check out the pictures below or click on the link and look at the website). The lip gloss is a very light pink pearl color, which is perfect to were over other lipsticks to give it some extra shine.

 This are the new eyeshadows and lip gloss
Mary Kay NouriShine Plus Lip Gloss in Berry Tart


Above: Limited Edition Mary Kay Semi-Matte Lipstick in Pink Moonstone and Limited Edition Lip shimmer in Pearl Rose. For some reason I couldn't find this shimmer on the website...maybe it's out since it´s limited edition.

From the top: Berry Tart lip gloss, Denim frost eyeshadow, Blue metal eyeshadow, Pink moonstone lipstick and Pearl rose lip shimmer.

I'm really looking forward to start using these. At first I didn't like Mary Kay eyeshadows because the color didn't show so easily but I have figured that they are dependent on a good base and a good technique when applying them. But I like a little challenge.
See ya´ll soon!


2014/11/07

The weekly makeup

Hello party people!
Guess what! the first snow this winter has fallen! And I am so excited. It's probably not gonna stay for long, but I can feel christmas getting closer...And I LOVE christmas!
Through december I´m gonna try and put together some holiday looks for christmas and new years. And also something chilly and frosty...whatever that might be...
But this week I did a whole face makeup that isn't so wintry but more fall. I use a triple eyeshadow palette from IsaDora for this look. I think I have said it before but small palettes like this one and like the quads from MAC are perfect if you don´t know what eyeshadows you need or want or if your travelling and don´t want to bring a whole bunch of makeup. They often contains enough colors to do a whole eye makeup.
Did I mention I Love christmas?? Oh yes I did. but seriously i'm preparing the whole year for this, ok not the whole year but yes I try to sneak in christmas as soon as I can. Like now, I have convinced my wonderful boyfriend to get me some christmas movies (Santa baby, Mickey's christmas carol and Miracle on 34th street) just because the first snow has fallen (and disappeared, so not important!). Anyway, I can´t wait! Back to the look, check out the pictures...


Products used:
NYX Jumbo eye pencil in Iced Mocha: As a base on the whole eyelid. Blending with my finger.
IsaDora triple eyeshadow in 17Fuchsia: Taking the lightest color, the light pink, on a Sigma E55 brush and patting it on all over the lid. Then taking the darkes color in the palette on a fluffy angled brush. I used Kicks eyeshadow contour brush. It´s similar to the Sigma E70, but just a bit bigger and a bit fluffier. Blending the color in the outer corner of the lid, creating the v-shape and working it up in the crease. To soften up the edges I used a fluffy blending brush like the Sigma E40. Here I tried to soften up the edges yet still keep the cat eye effect, if you understand what I mean.
MAC eyeshadow in Shroom: As a highlight under the eyebrow.
IsaDora colorful eyeliner in Black: A fine line on the upper lash line. For this look I did a pretty long wing, but still not so thick. Of course you can do this in whatever way you want. More dramatic - less dramatic.
Sephora retractable eyeliner in matte black: On the lower (and upper) waterline.
Maybelline Rocket volume express: Mascara, yes.
 
On the rest of the face:
Mary Kay cc-cream in Deep
Mary Kay translucent powder
Mary Kay lip balm in vanilla berry
 
So that's this week's look, hope you liked it, I certainly did. Stay tuned. I have a feeling there's a lot happening this winter...


2014/11/01

Happy Halloween!

And i'm back, this time with a halloween makeup. I don't really know what i'm supposed to look like, I just kind of winged it. But it turned out pretty good if I may say so myself. I really like halloween as a holiday, or a time to dress up and decorate with creepy stuff. This year I haven't done anything special for halloween but I still wanted to do some sort of makeup. I also helped a friend get ready for a halloween party just now. She was dressed as a crazy science project woman, pregnant with two monkeys. One eating his way out of her belly and the other one hanging from the umbilical cord. So disgusting! but pretty clever.
Last year I made a halloween dinner for my family. We decorate the apartment with spider web, spiders and rats (all fake of course) and skeletons and candles. We had cut out a big Jack o'lantern with a candle in and placed it on the balcony. As a background music I had made a mixed playlist with screams, crying sounds, the classic halloween-organ sound (whatever it´s called) and other spooky sounds. For dinner I had made a shrimp soup. The biggest focus was on the dessert. I had made cakepops and cupcakes with fun decorations. My parents and my sister were all dressed up real spooky. My boyfriend had made a mask and I was dressed as Emily the corpse bride.That was a good night. As a good end we watched The Shining....Here's Johnny!...
At the end of the post I added some pictures from last year. Right below is this years look.


Products used:
Face color (unknown brand) in white: First using a sponge and placing color all over my face and then using a foundation brush, Sigma F60,to even it out.
NYX Jumbo Eye pencil in Black bean: As a base on the eyelid and then blending it out with my finger.
88 Palette the darkest red (two steps from the black): With the Sigma E55 I put some red eyeshadow under the lower lash line and then using whatever's left on the brush and placing it on the brow bone, all the way up to the eyebrow.
IsaDora quartet in Paradox: The matte black on the Sigma E40 and shading it under the eye and upp around the eyelid.
Fantasy makeup liquid color in black: With an eyeliner brush like Sigma E05 I created the lips and the lines around the eyes and the eyebrows (look at the pictures above)
The blood was made with a red face crayon and some of the red eyeshadow over.


Trick or treat and once again Happy Halloween!